
How to resize an image in Photoshop
Image editing programs like Adobe Photoshop are ideal when resizing images. Enlargements and reductions can be done easily to print a document with a larger image size or a higher resolution (while retaining document size).
Every image has three core features that define it's appearance.
- File size, which is measured in bytes (kilobytes, megabytes, etc.)
- Dimension, which is width x height in any unit of measure (pixels for digital, inches or centimeters for print)
- Resolution, which is measured in dots per inch for print (DPI) or pixels per inch for digital (PPI)
When you resize an image, you change the dimensions and density of the pixels that define its quality.
There is one certainty, the more pixels per inch, the better the resolution and the higher the output quality.
In Photoshop you can access the Image Size window by first opening an image and then selecting in the top menu "Image -> Image Size" or by applying the shortcut "Ctrl + Alt + i".
The features we are interested in are Width, Height and resolution.
Changing the units of measurement to millimeter or inches will show the size of the image in combination with the output quality.
Anything over 150 dpi should print OK at the dimensions given.
An example
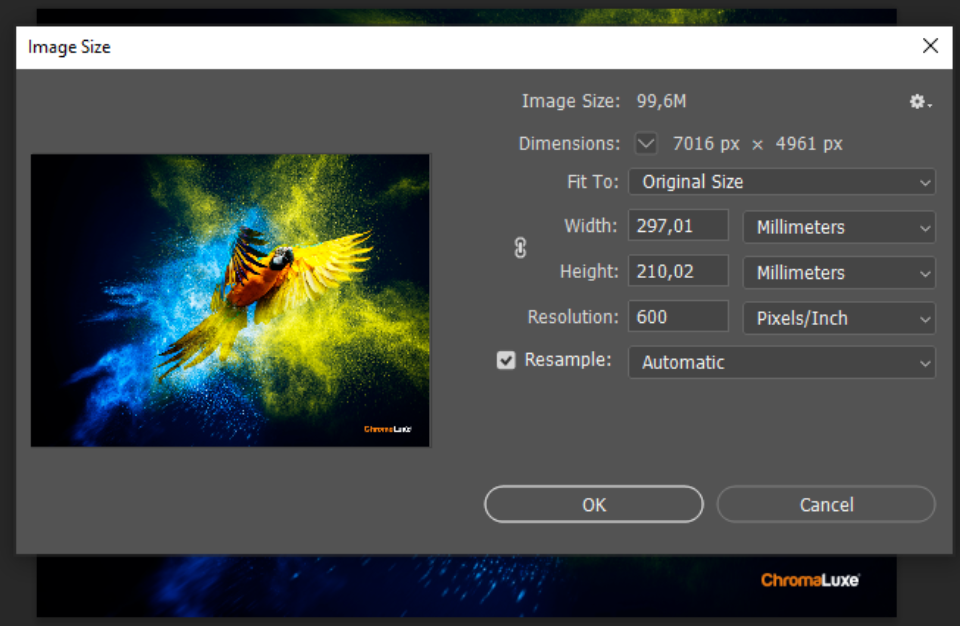
This image will print on 297 x 210 mm (or A4) at 600 dpi.
Now we would like the image to result in a 400 mm wide print.
We select the chain symbol in front of Width/Height so they are connected.
Now we change the width of the image, the height will change proportionally.
We set width to 400 mm. Height will adapt automatically to 282,84 mm.
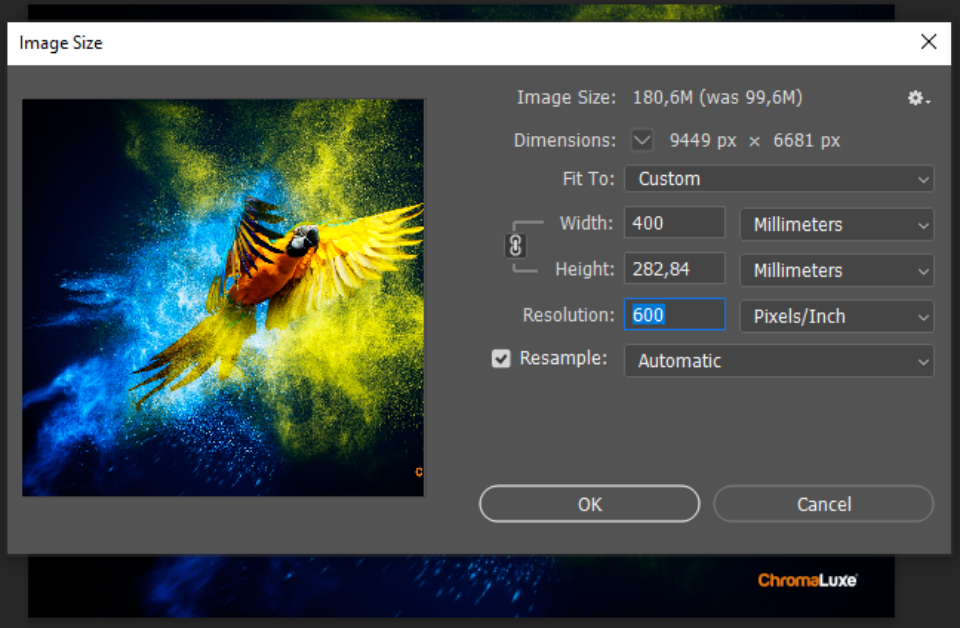
The Image Size grows to 180 MB because the resolution is unchanged.
Now we change the image resolution to 300 and the image size will drop to 24,9 MB.
Do you want to read more?
Create your free account to receive access to our technical support portal.